Uygulamalarda çok sık gördüğümüz bir buton türü olan FloatingActionButton, FAB buton, diye de adlandırılır. Türkçeye kayar yüzer buton olarak çevirebiliriz. Float yüzmek anlamına gelir.
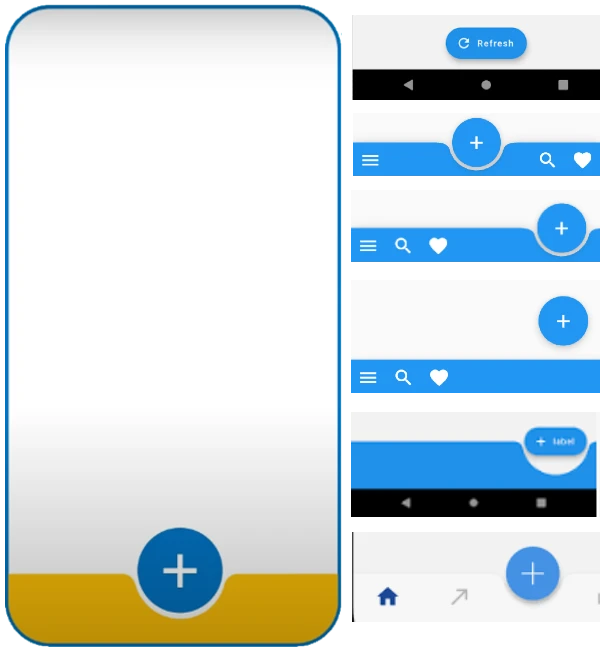
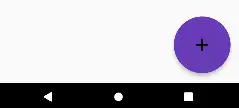
Scaffold içerisinde floatingActionButton parametresine verilerek kullanılır ve diğer widgetlar bu butonu etkilemez. Ekranda sabit olarak kalır. Ekranın farklı noktalarına yerleştirilebilir. Farklı şekillerde ve renklerde oluşturulabilir. Aşağıda görselini attığım buton türüdür.
FloatingActionButton (FAB) Oluşturulması
Scaffold içerisinde foatingActionButton parametresine FloatingActionButton widget’ını vererek oluşturuyoruz.
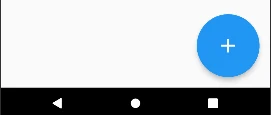
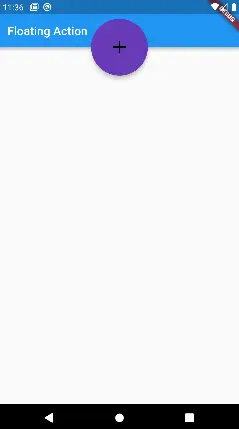
İlk oluşturma anında floatActionButton: FloatActionButton() olarak verebiliriz. Varsayılan olarak orta boyutta içerisine icon koyabileceğimiz bir buton oluşuyor. Aşağıdaki gibi.
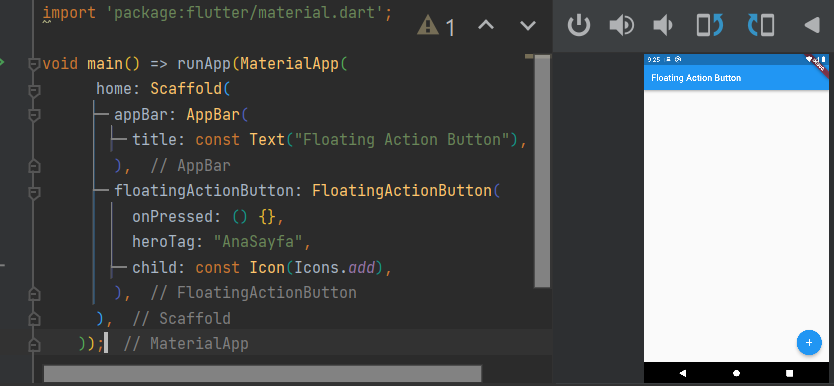
import 'package:flutter/material.dart';

void main() => runApp(MaterialApp(
      home: Scaffold(
        appBar: AppBar(
          title: const Text("Floating Action Button"),
        ),
        floatingActionButton: FloatingActionButton(
          onPressed: () {},
          heroTag: "AnaSayfa",
          child: const Icon(Icons.add),
        ),
      ),
    ));
FloatingActionButton (FAB) Özellikleri
FAB butonunu ilk oluştururken sonuna nokta koyduğumuzda bize aşağıda görseldeki gibi üç seçenek sunuyor.
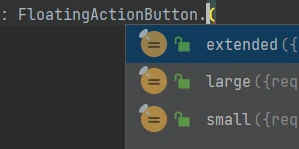
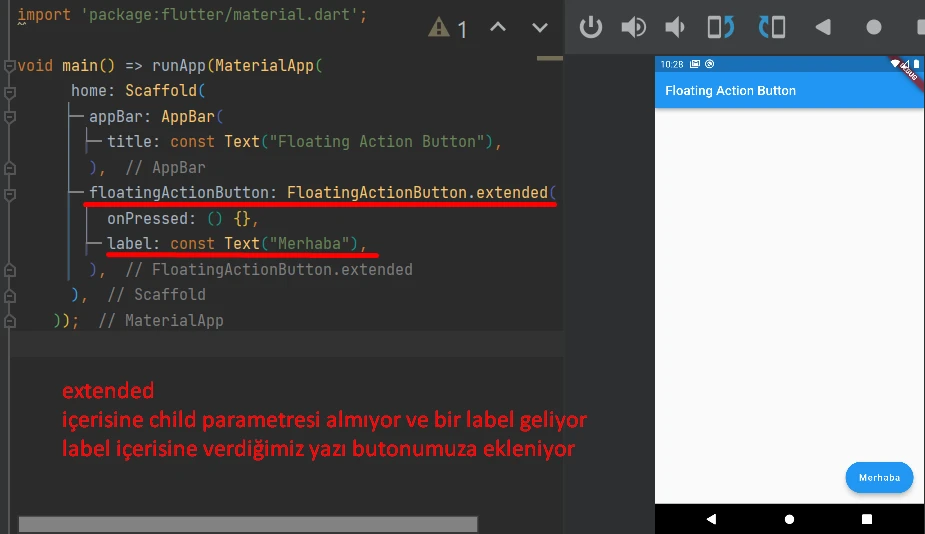
FloatActionButton.extended
extended dediğimizde içerisine bir child parametresi almıyor.
label parametresi ile butonun üstüne bir yazı ve yine içerisinde bulunan icon parametresi ile bir icon alıp aynı anda kullanabiliriz.
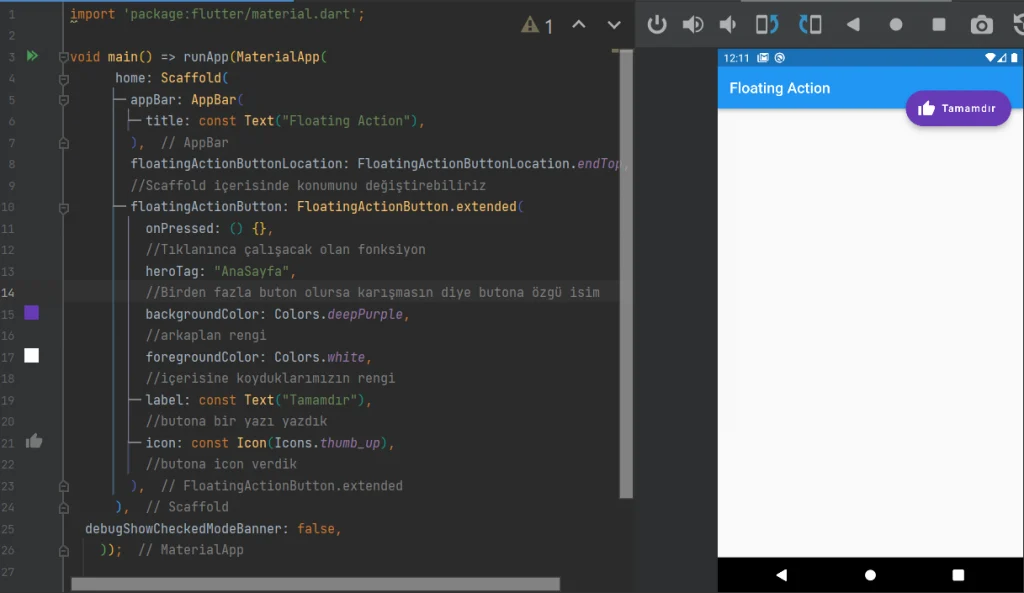
import 'package:flutter/material.dart';

void main() => runApp(MaterialApp(
      home: Scaffold(
        appBar: AppBar(
          title: const Text("Floating Action"),
        ),
        floatingActionButtonLocation: FloatingActionButtonLocation.endTop,
        //Scaffold içerisinde konumunu değiştirebiliriz
        floatingActionButton: FloatingActionButton.extended(
          onPressed: () {},
          //Tıklanınca çalışacak olan fonksiyon
          heroTag: "AnaSayfa",
          //Birden fazla buton olursa karışmasın diye butona özgü isim
          backgroundColor: Colors.deepPurple,
          //arkaplan rengi
          foregroundColor: Colors.white,
          //içerisine koyduklarımızın rengi
          label: const Text("Tamamdır"),
          //butona bir yazı yazdık
          icon: const Icon(Icons.thumb_up),
          //butona icon verdik
        ),
      ),
  debugShowCheckedModeBanner: false,
));FloatActionButton.large
FloatActionButton.small
FloatingActionButton onPressed:
İçerisinde onPressed parametresi mecburen verilmelidir. Bizden bir fonksiyon istiyor. Butona basılınca ne olacağını fonksiyon olarak burada belirtmeliyiz.
onPressed: () {},
//içerisine çalışmasını istediğimiz fonksiyonu yazıyoruz.
FloatingActionButton heroTag:
Birden fazla FloatingActionButton kullandığımızda bu etiket hata çıkmasını önlüyor. Butona özel bir isim.
        floatingActionButton: FloatingActionButton.large(
          onPressed: () {},
          heroTag: "AnaSayfa",
          backgroundColor: Colors.deepPurple,
          foregroundColor: Colors.black,
          child: const Icon(Icons.add),
        ),
FloatingActionButton child:
İçerisine bir Widget alıyor, genelde Icon Widget’ı konulur, bir Text Widget’ı da verebiliriz.
FloatingActionButton backgroundColor:
Butonun arka plan rengini değiştirebiliriz.

        floatingActionButton: FloatingActionButton.large(
          onPressed: () {},
          backgroundColor: Colors.deepPurple,
          child: const Icon(Icons.add),
        ),
FloatingActionButton forgroundColor:
Butonun child özelliğine verdiğimiz widget’ın rengini değiştirir.
floatingActionButton: FloatingActionButton.large(
onPressed: () {},
backgroundColor: Colors.deepPurple,
foregroundColor: Colors.black,
child: const Icon(Icons.add),
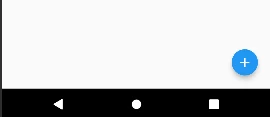
),FloatingActionButton mini:
true yada false alır. true değeri alırsa butonun boyutunu küçültür.

        floatingActionButton: FloatingActionButton(
          onPressed: () {},
          mini: true,
          child: const Icon(Icons.add),
        ),
FloatingActionButton tooltip:
Butonun üzerine basık tuttuğumuzda ipucu verir.
tooltip: "AnaSayfa",FloatingActionButton shape:
Butonun şekli ile ilgili ayarlar yapılabilir. Örneğin kenarlarına border verilebilir, radius ayarları yapılabilir.

import 'package:flutter/material.dart';

void main() => runApp(MaterialApp(
      home: Scaffold(
        appBar: AppBar(
          title: const Text("Floating Action"),
        ),
        floatingActionButtonLocation: FloatingActionButtonLocation.endFloat,
        floatingActionButton: FloatingActionButton.extended(
          onPressed: () {},
          backgroundColor: Colors.deepPurple,
          foregroundColor: Colors.white,
          shape: const RoundedRectangleBorder(
            borderRadius: BorderRadius.all(Radius.elliptical(10, 10)),
            side: BorderSide(
                color: Colors.blue, style: BorderStyle.solid, width: 3),
          ),
          label: const Text(
            "Merhaba Flutter",
            style: TextStyle(fontSize: 20),
          ),
          icon: const Icon(Icons.add_alert),
        ),
      ),
      debugShowCheckedModeBanner: false,
    ));
FloatingActionButton Konumlandırma
FAB butonumuzun konumunu değiştirmek için Scaffold içerisinde floatingActionButtonLocation parametresine özellikler verilebilir.
Özellik çok fazla olduğu için aşağıda bir örnek yaptım.

Örneğimiz;
import 'package:flutter/material.dart';

void main() => runApp(MaterialApp(
      home: Scaffold(
        appBar: AppBar(
          title: const Text("Floating Action"),
        ),
        floatingActionButtonLocation: FloatingActionButtonLocation.,
        floatingActionButton: FloatingActionButton.large(
          onPressed: () {},
          heroTag: "AnaSayfa",
          backgroundColor: Colors.deepPurple,
          foregroundColor: Colors.black,
          child: const Icon(Icons.add),
        ),
      ),
    ));
FloatingActionButton Uygulama Örnekleri
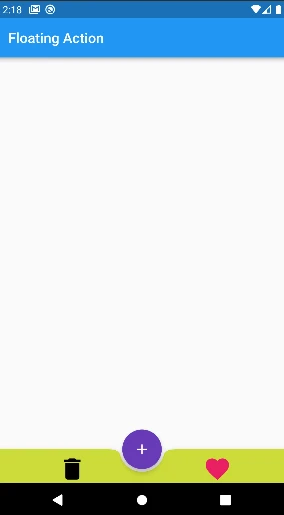
Aşağıdaki örnekte BottomAppBar kullanarak en alt tarafa bir araç çubuğu yerleştirdik.
BottomAppBar’ımızın içerisine bir Row kullanarak içerisine ikitane IconButton almasını sağladık.
shape: CircularNotchedRectangle() özelliğini kullandık ve FloatingActionButton’umuz üstünde bu şekilde konumlandı.
import 'package:flutter/material.dart';

void main() => runApp(MaterialApp(
      home: Scaffold(
        appBar: AppBar(
          title: const Text("Floating Action"),
        ),
        floatingActionButtonLocation: FloatingActionButtonLocation.centerDocked,
        bottomNavigationBar: BottomAppBar(
          shape: CircularNotchedRectangle(),
          color: Colors.lime,

          child: Row(
            mainAxisSize: MainAxisSize.max,
            mainAxisAlignment: MainAxisAlignment.spaceAround,
            children: <Widget>[
              IconButton(
                icon: Icon(Icons.delete, color: Colors.black, size: 40,),
                onPressed: () {},
              ),
              IconButton(
                icon: Icon(Icons.favorite, color: Colors.pink,size: 40,),
                onPressed: () {},
              ),
            ],
          ),
        ),
        floatingActionButton: FloatingActionButton(
          onPressed: () {},
          heroTag: "AnaSayfa",
          backgroundColor: Colors.deepPurple,
          foregroundColor: Colors.white,
          child: Icon(Icons.add,),

        ),
      ),
      debugShowCheckedModeBanner: false,
    ));
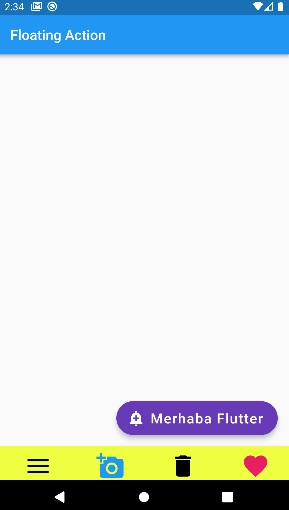
Bir başka örnek;
import 'package:flutter/material.dart';
void main() => runApp(MaterialApp(
home: Scaffold(
appBar: AppBar(
title: const Text("Floating Action"),
),
floatingActionButtonLocation: FloatingActionButtonLocation.endFloat,
bottomNavigationBar: BottomAppBar(
color: Colors.limeAccent,
child: Row(
mainAxisSize: MainAxisSize.max,
mainAxisAlignment: MainAxisAlignment.spaceAround,
children: <Widget>[
IconButton(
icon: Icon(
Icons.menu,
color: Colors.black,
size: 40,
),
onPressed: () {},
),
IconButton(
icon: Icon(
Icons.add_a_photo,
color: Colors.blue,
size: 40,
),
onPressed: () {},
),
IconButton(
icon: Icon(
Icons.delete,
color: Colors.black,
size: 40,
),
onPressed: () {},
),
IconButton(
icon: Icon(
Icons.favorite,
color: Colors.pink,
size: 40,
),
onPressed: () {},
),
],
),
),
floatingActionButton: FloatingActionButton.extended(
onPressed: () {},
heroTag: "AnaSayfa",
backgroundColor: Colors.deepPurple,
foregroundColor: Colors.white,
label: Text(
"Merhaba Flutter",
style: TextStyle(fontSize: 20),
),
icon: Icon(Icons.add_alert),
),
),
debugShowCheckedModeBanner: false,
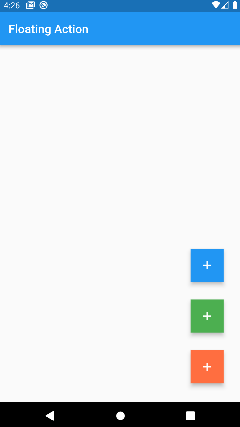
));Birden fazla Floating Action Button Oluşturmak
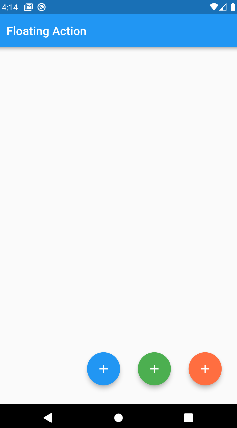
direction: Axis.horizontal, yerine direction: Axis.vertical, yazarsanız butonlar üst üste yer alırlar.
import 'package:flutter/material.dart';

void main() => runApp(MaterialApp(
      home: Scaffold(
        appBar: AppBar(
          title: const Text("Floating Action"),
        ),
        floatingActionButtonLocation: FloatingActionButtonLocation.endFloat,
        floatingActionButton: Wrap(
          direction: Axis.horizontal,
          children: <Widget>[
            Container(
                margin: const EdgeInsets.all(15),
                child: FloatingActionButton(
                  onPressed: () {
                    //action code for button 1
                  },
                  child: const Icon(Icons.add),
                )), //button first

            Container(
                margin: const EdgeInsets.all(15),
                child: FloatingActionButton(
                  onPressed: () {},
                  backgroundColor: Colors.green,
                  child: const Icon(Icons.add),
                )),

            Container(
                margin: const EdgeInsets.all(15),
                child: FloatingActionButton(
                  onPressed: () {},
                  backgroundColor: Colors.deepOrangeAccent,
                  child: const Icon(Icons.add),
                )),

            // Add more buttons here
          ],
        ),
      ),
      debugShowCheckedModeBanner: false,
    ));
Birden fazla Floating Action Button Dikey Konumda
import 'package:flutter/material.dart';

void main() => runApp(MaterialApp(
      home: Scaffold(
        appBar: AppBar(
          title: const Text("Floating Action"),
        ),
        floatingActionButtonLocation: FloatingActionButtonLocation.endFloat,
        floatingActionButton: Wrap(
          direction: Axis.vertical,
          children: <Widget>[
            Container(
                margin: const EdgeInsets.all(15),
                child: FloatingActionButton(
                  shape:const BeveledRectangleBorder(
                      borderRadius: BorderRadius.zero
                  ),
                  onPressed: () {

                  },
                  child: const Icon(Icons.add),
                )),

            Container(
                margin: const EdgeInsets.all(15),
                child: FloatingActionButton(
                  shape:const BeveledRectangleBorder(
                      borderRadius: BorderRadius.zero
                  ),
                  onPressed: () {},
                  backgroundColor: Colors.green,
                  child: const Icon(Icons.add),

                )),

            Container(
                margin: const EdgeInsets.all(15),
                child: FloatingActionButton(
                  shape:const BeveledRectangleBorder(
                      borderRadius: BorderRadius.zero
                  ),
                  onPressed: () {},
                  backgroundColor: Colors.deepOrangeAccent,
                  child: const Icon(Icons.add),

                )),

            // Add more buttons here
          ],
        ),
      ),
      debugShowCheckedModeBanner: false,
    ));
Şimdilik benden bu kadar,,,